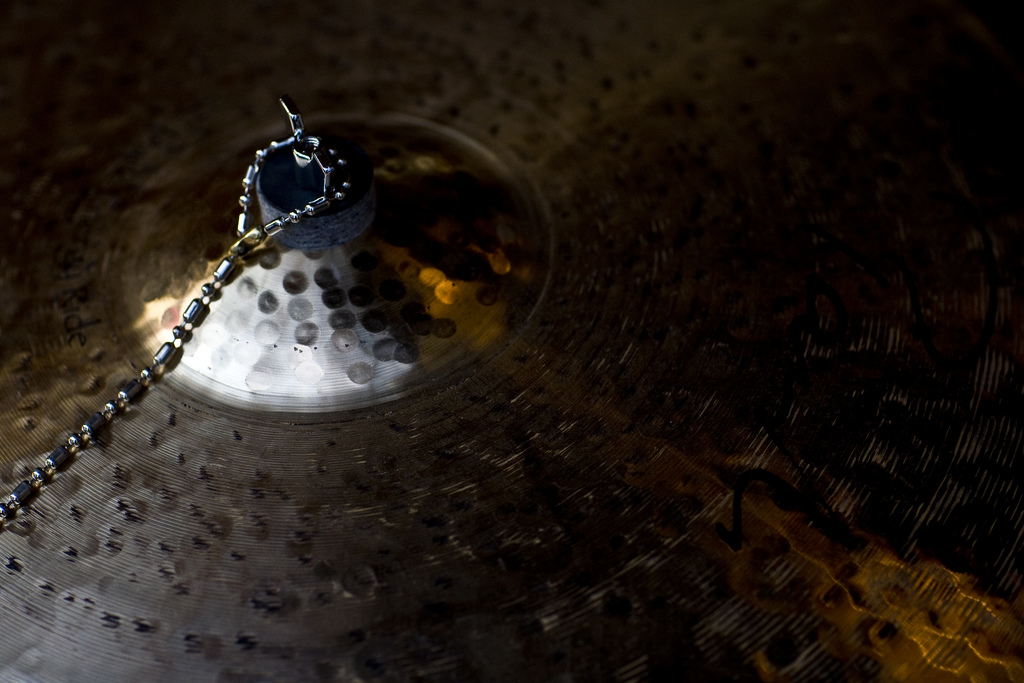
Photo Credit: Owen Byrne
Hi Hats
Beginners often play the hi hat too loud, and sometimes this is down to where they are hitting on the hi hat cymbals rather than how hard they are hitting. As a result, their playing sounds messy, and their sticks wear more quickly. If this is happening to you, it may be time to address your technique for playing the hi hats.
Regular hi hat sounds should be played using the tip of the stick on the top of the hi hat, half way between the edge and the bell, and range of dynamics can be played here. The left foot should press down quite a bit so that the sound is clean and tight. However, too much pressing down with the foot will give the sound a weird ringing noise, which doesn’t sound good, as well as being tiring pressing down with the left foot for long periods of time.
The area closer to the bell has a higher frequency tone, which is good for a brighter sound. This area is good for styles like soul funk, particularly for adding in open hi hats.
The edge of the hi hat should be reserved for accents or for more frequent use in heavy genres like hard rock and metal. Even in those styles though, variation between the top and edge are effective.
The edge of the hi hat should be played with the thick part of the drum stick, which is called the shoulder. This is the best part of the hi hat to get an open slushy sound – this is used most of the time in metal music and fairly often in rock too.
For most other styles, single open hi hats that close after are best played with the tip of the stick on the top of the hi hat. This gives a crisp clean sound. You will find that these compliment a drum groove nicely, and that playing an open hi hat on the edge is good for times when you want it to stand out more – for example if a band is playing some stabbed rhythms.
To get a nice sizzley jazz open hi hat sound, try hooking on a light chain on the top of the cymbal.
Finally, you need a good set of cymbals! For a good studio recording or live playing, an expensive set of cymbals will always be better. You can still sound good though by following the advice above, as long as you have a set of fairly heavy weighted cymbals, unlike the water thin style cymbals that come with some cheap beginners kits.
I will leave you with this thought: a well played set of cheap hi hats will always sound better than badly played top of the range hi hats.
Ride Cymbal
The ride cymbal can be pretty loud, so always try to lower your stick so that your strokes are fairly close to the ride cymbal – this should help keep the volume from getting out of control and also give you dynamic room at add accents on the ride or the bell when needed. Make sure to hit the ride half way between the edge and the bell with the tip of the stick – NOT the shoulder (keep that arm up!). Play the bell with the shoulder of the stick, or if you want a light bell sound, with the tip of the stick. You can crash the ride too when required. To get a nice sizzley jazz sound, try hooking on a light chain on the top of the cymbal (as pictured in the featured image).
Crash Cymbal
Always “Crash” using the shoulder of the drum stick, on the edge of the cymbal at about a 45 degree angle. Hitting it to the left or right of the middle will help prevent cymbal cracking. Strike with a glancing blow whilst also following through with your stick. Continue the motion left or right depending on where you are going to next. For example, if the cymbal is on the left hand side of the drum kit and you want to get to the ride cymbal next, hit the cymbal at the right of the middle and glance off to the right – you’ll arrive at the ride cymbal much quicker.
You can also play a crash cymbal like a ride cymbal, with the tip of the stick. For example, in Jazz this can provide opportunity for variation when there are a lot of ride based drum beats.
China and Splash Cymbals
Play these like you would play a crash cymbal.
Bell Cymbals
Like a huge bell from a ride cymbal, these really cut through any mix and are usually played with the tip of the stick or sometimes with the shoulder of the stick. Some players have them positioned upside down. There is no right or wrong way.