Buy Now →
all 3 ebook versions included in the download:
Number of Pages in standard ebook: 48
Number of Pages in fast track book: 28
Number of Pages in super fast track book: 17
About the fast track books: 28 page PDF Fast Track Version is with section 1 and section 3 removed. Ideal for moving students quickly through topics. The removed sections 1 and 3 are really only easier versions of sections 2 and 4, so you won’t be missing anything vital. The super fast track is good if the student will pick up the content quickly and won’t need to do lots of exercises before moving on to something else. It’s to avoid it getting boring for the student. As a teacher, I was also getting bored with the longer books because the content gets a bit samey, so I often use the fast track versions with my students. However, some players may be glad of the extra exercises, and with the full 48 page book, at least you can pick and choose which pages to work on yourself, so feel free to cut pages wherever you like. Just make sure to include some of the 6/8 and 3/4 exercises, and also some of the ones with open hi hats.
Double sided printing is advised.
- 48 Pages
- Focusing on Drum Beats and Drum Fills
- Grade 1-2 Level
- For Students and Teachers
- Print unlimited copies for yourself or for students
Free Preview
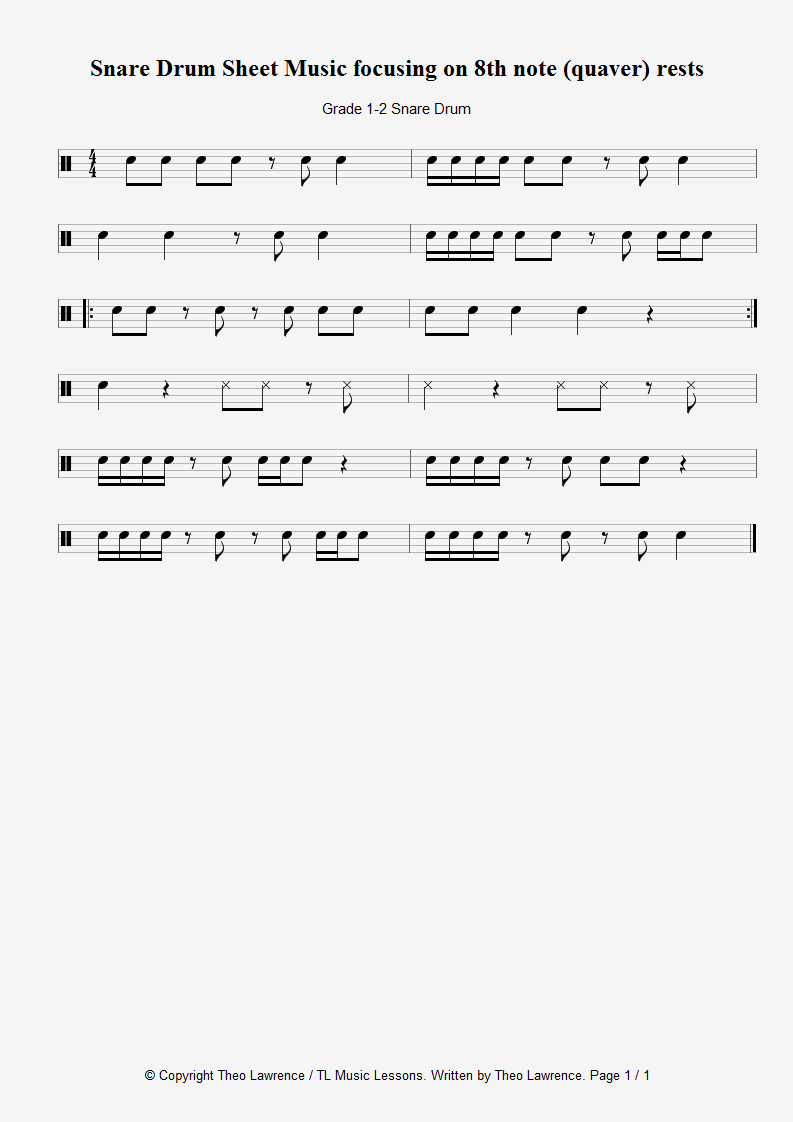
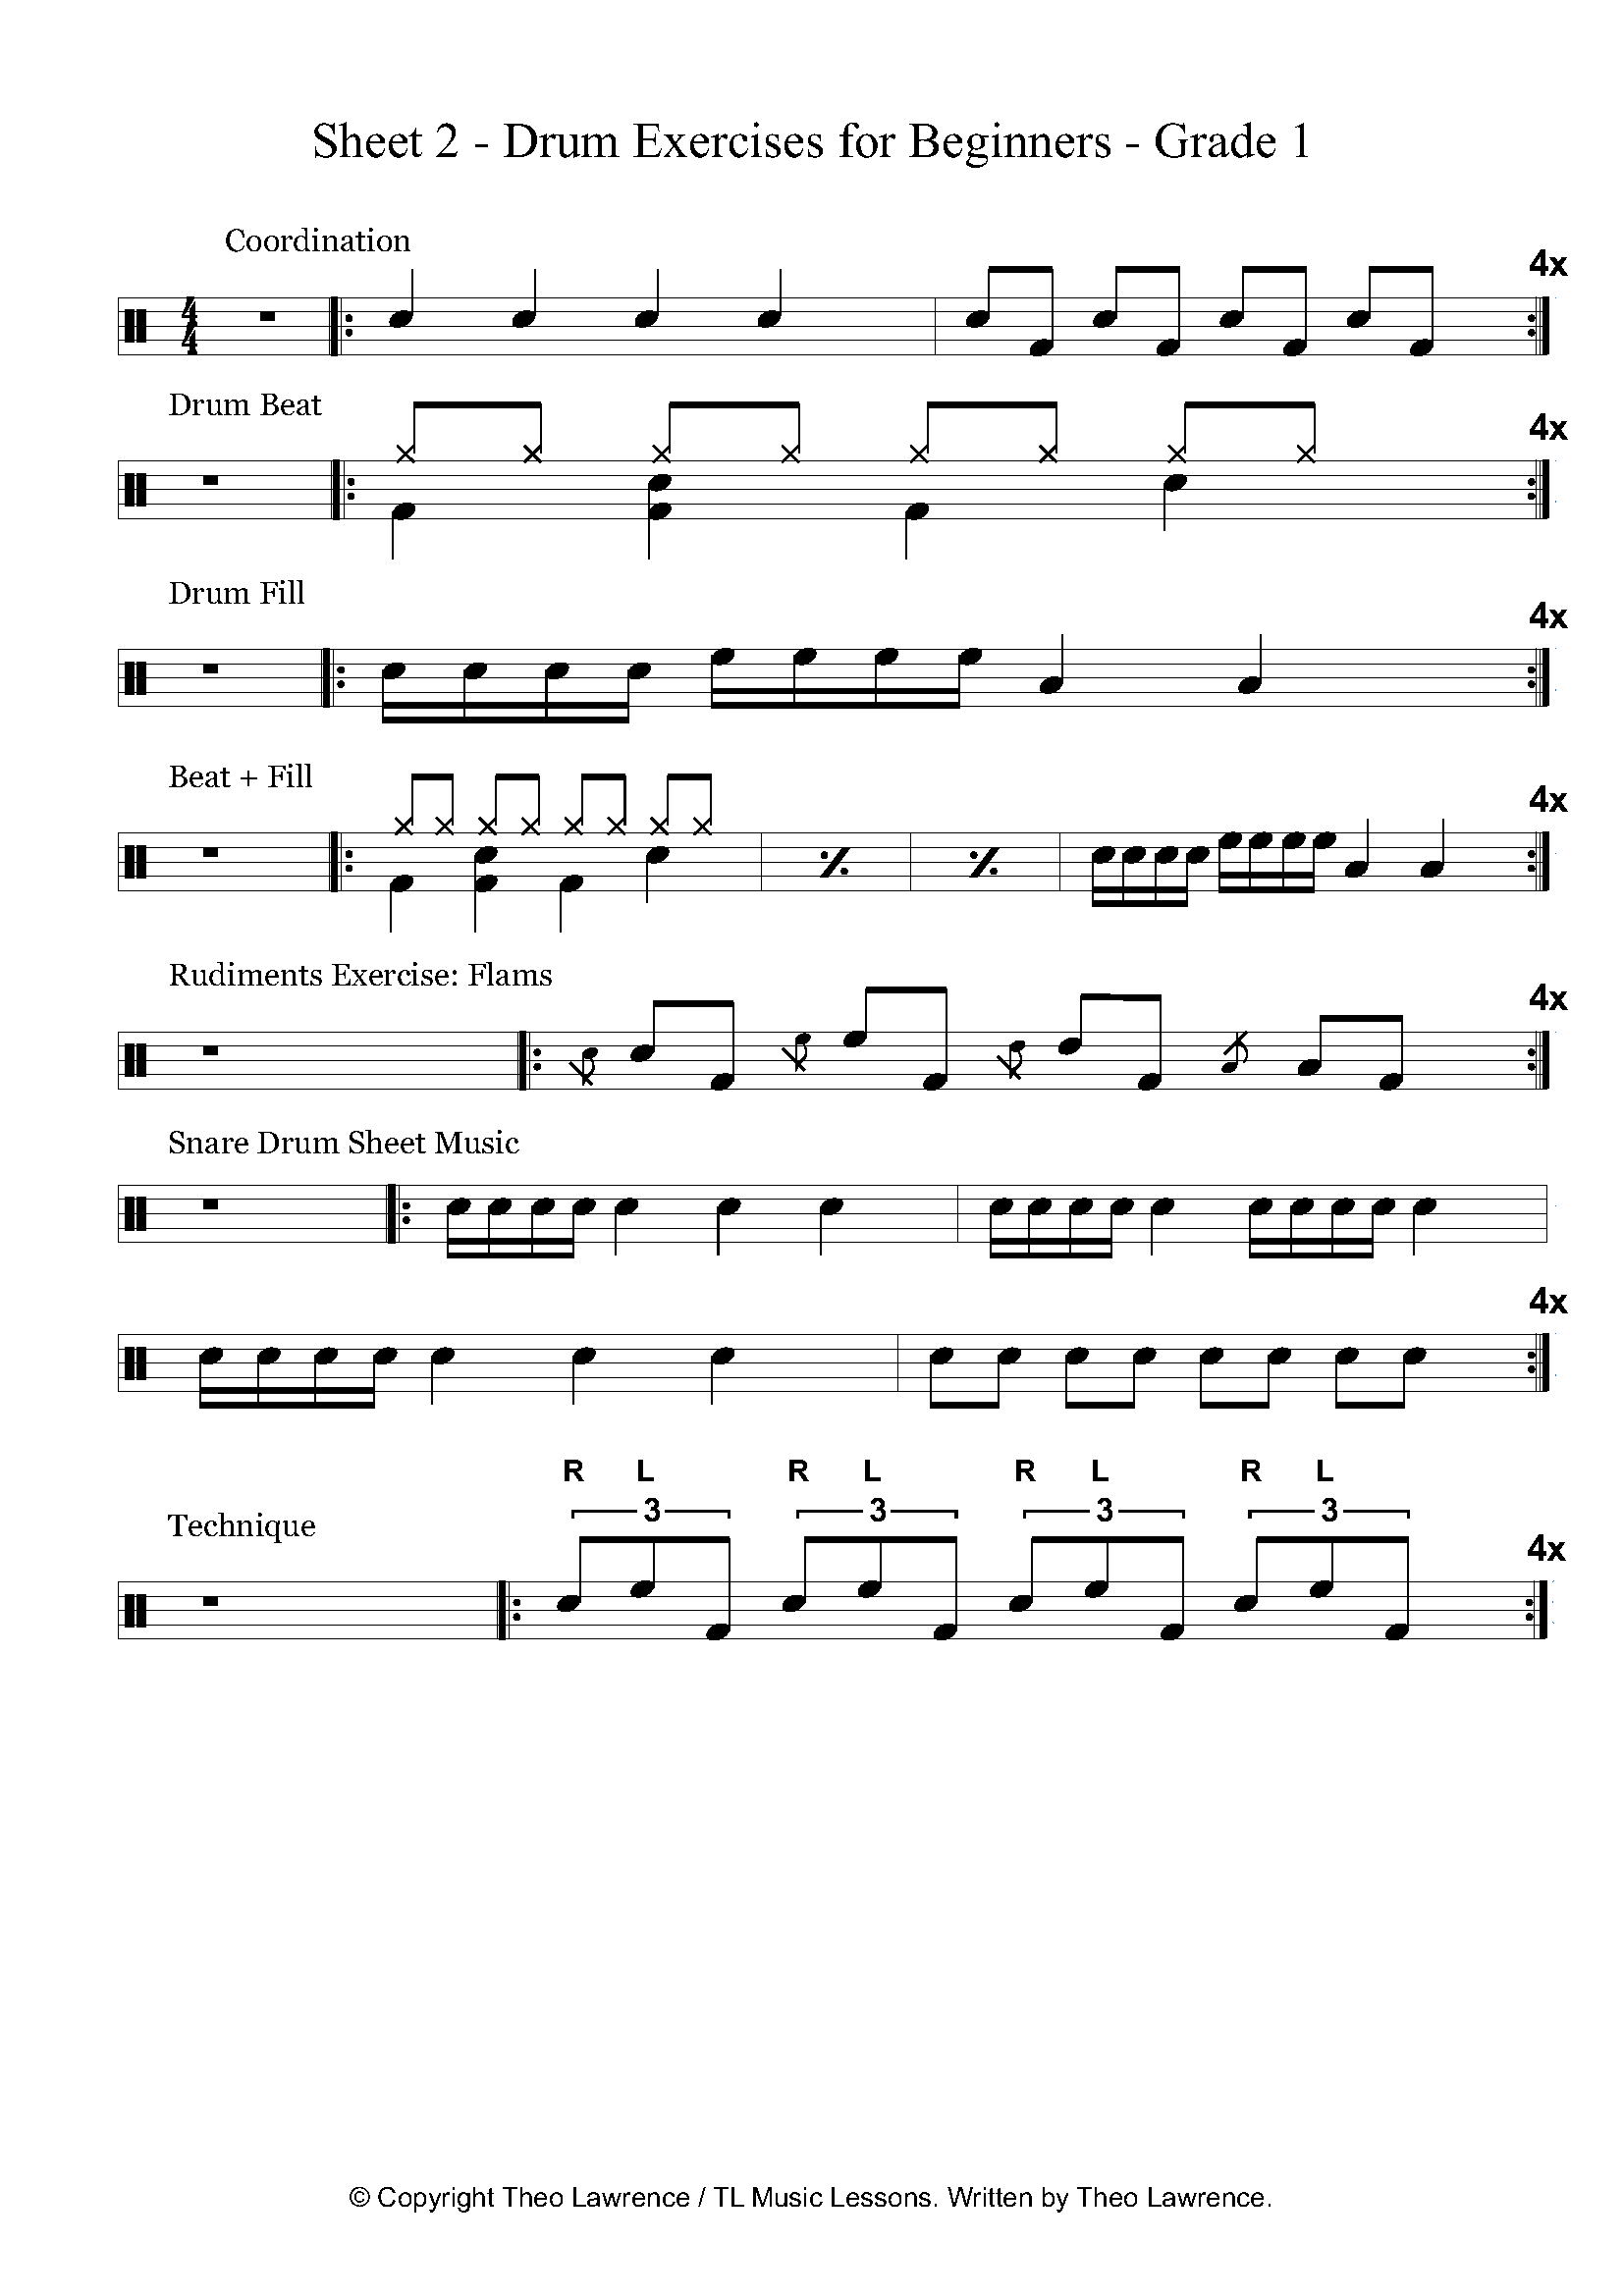
Here is a list of the 5 free sheets from this ebook, released as a series of posts:
Introduction
Grades 1-2 Beats & Fills Drum Book – Unit 1: Rock, Pop, Soul, Funk
This is my second ‘Beats & Fills’ drum book, following on from ‘Beats And Fills Drum Book – Basic Beginners’, which was released just over 6 months before this one. Some players will actually be able to move straight onto this book from the first one, whilst others may need some more easier ‘basic beginners’ work first. I will probably create more basic beginners books, but for now I am moving on so that there are books available for higher grades. Interestingly, the first book was 24 page and this new book is 48 pages, so I have managed to double the length without trying. Make sure to print this double sided.
This book has 5 structured sections (see contents), which in my head follows a pattern. With each section, the exercises get longer and more advanced. There is a chronological progression through the sections and within each section there are elements of both grades. For this reason, you may want to skip some pages in each section if they get too hard and come back to them later.
In the first two sections, we start out with 1 bar beats and then onto 2 bar beats. In sections 3-5 we introduce drum fills, starting with 1 beat fills, then 2 beat fills and finally progressing onto whole bar fills after 3 bars of a beat. By the end of the book, you should be well drilled in the basics of drumming and ready to start learning some songs on the drums.
Hope you enjoy the book and find it useful for either learning yourself or for teaching others with.
Once purchased, you may print out copies for yourself or for your students if you are a teacher.
Full Contents
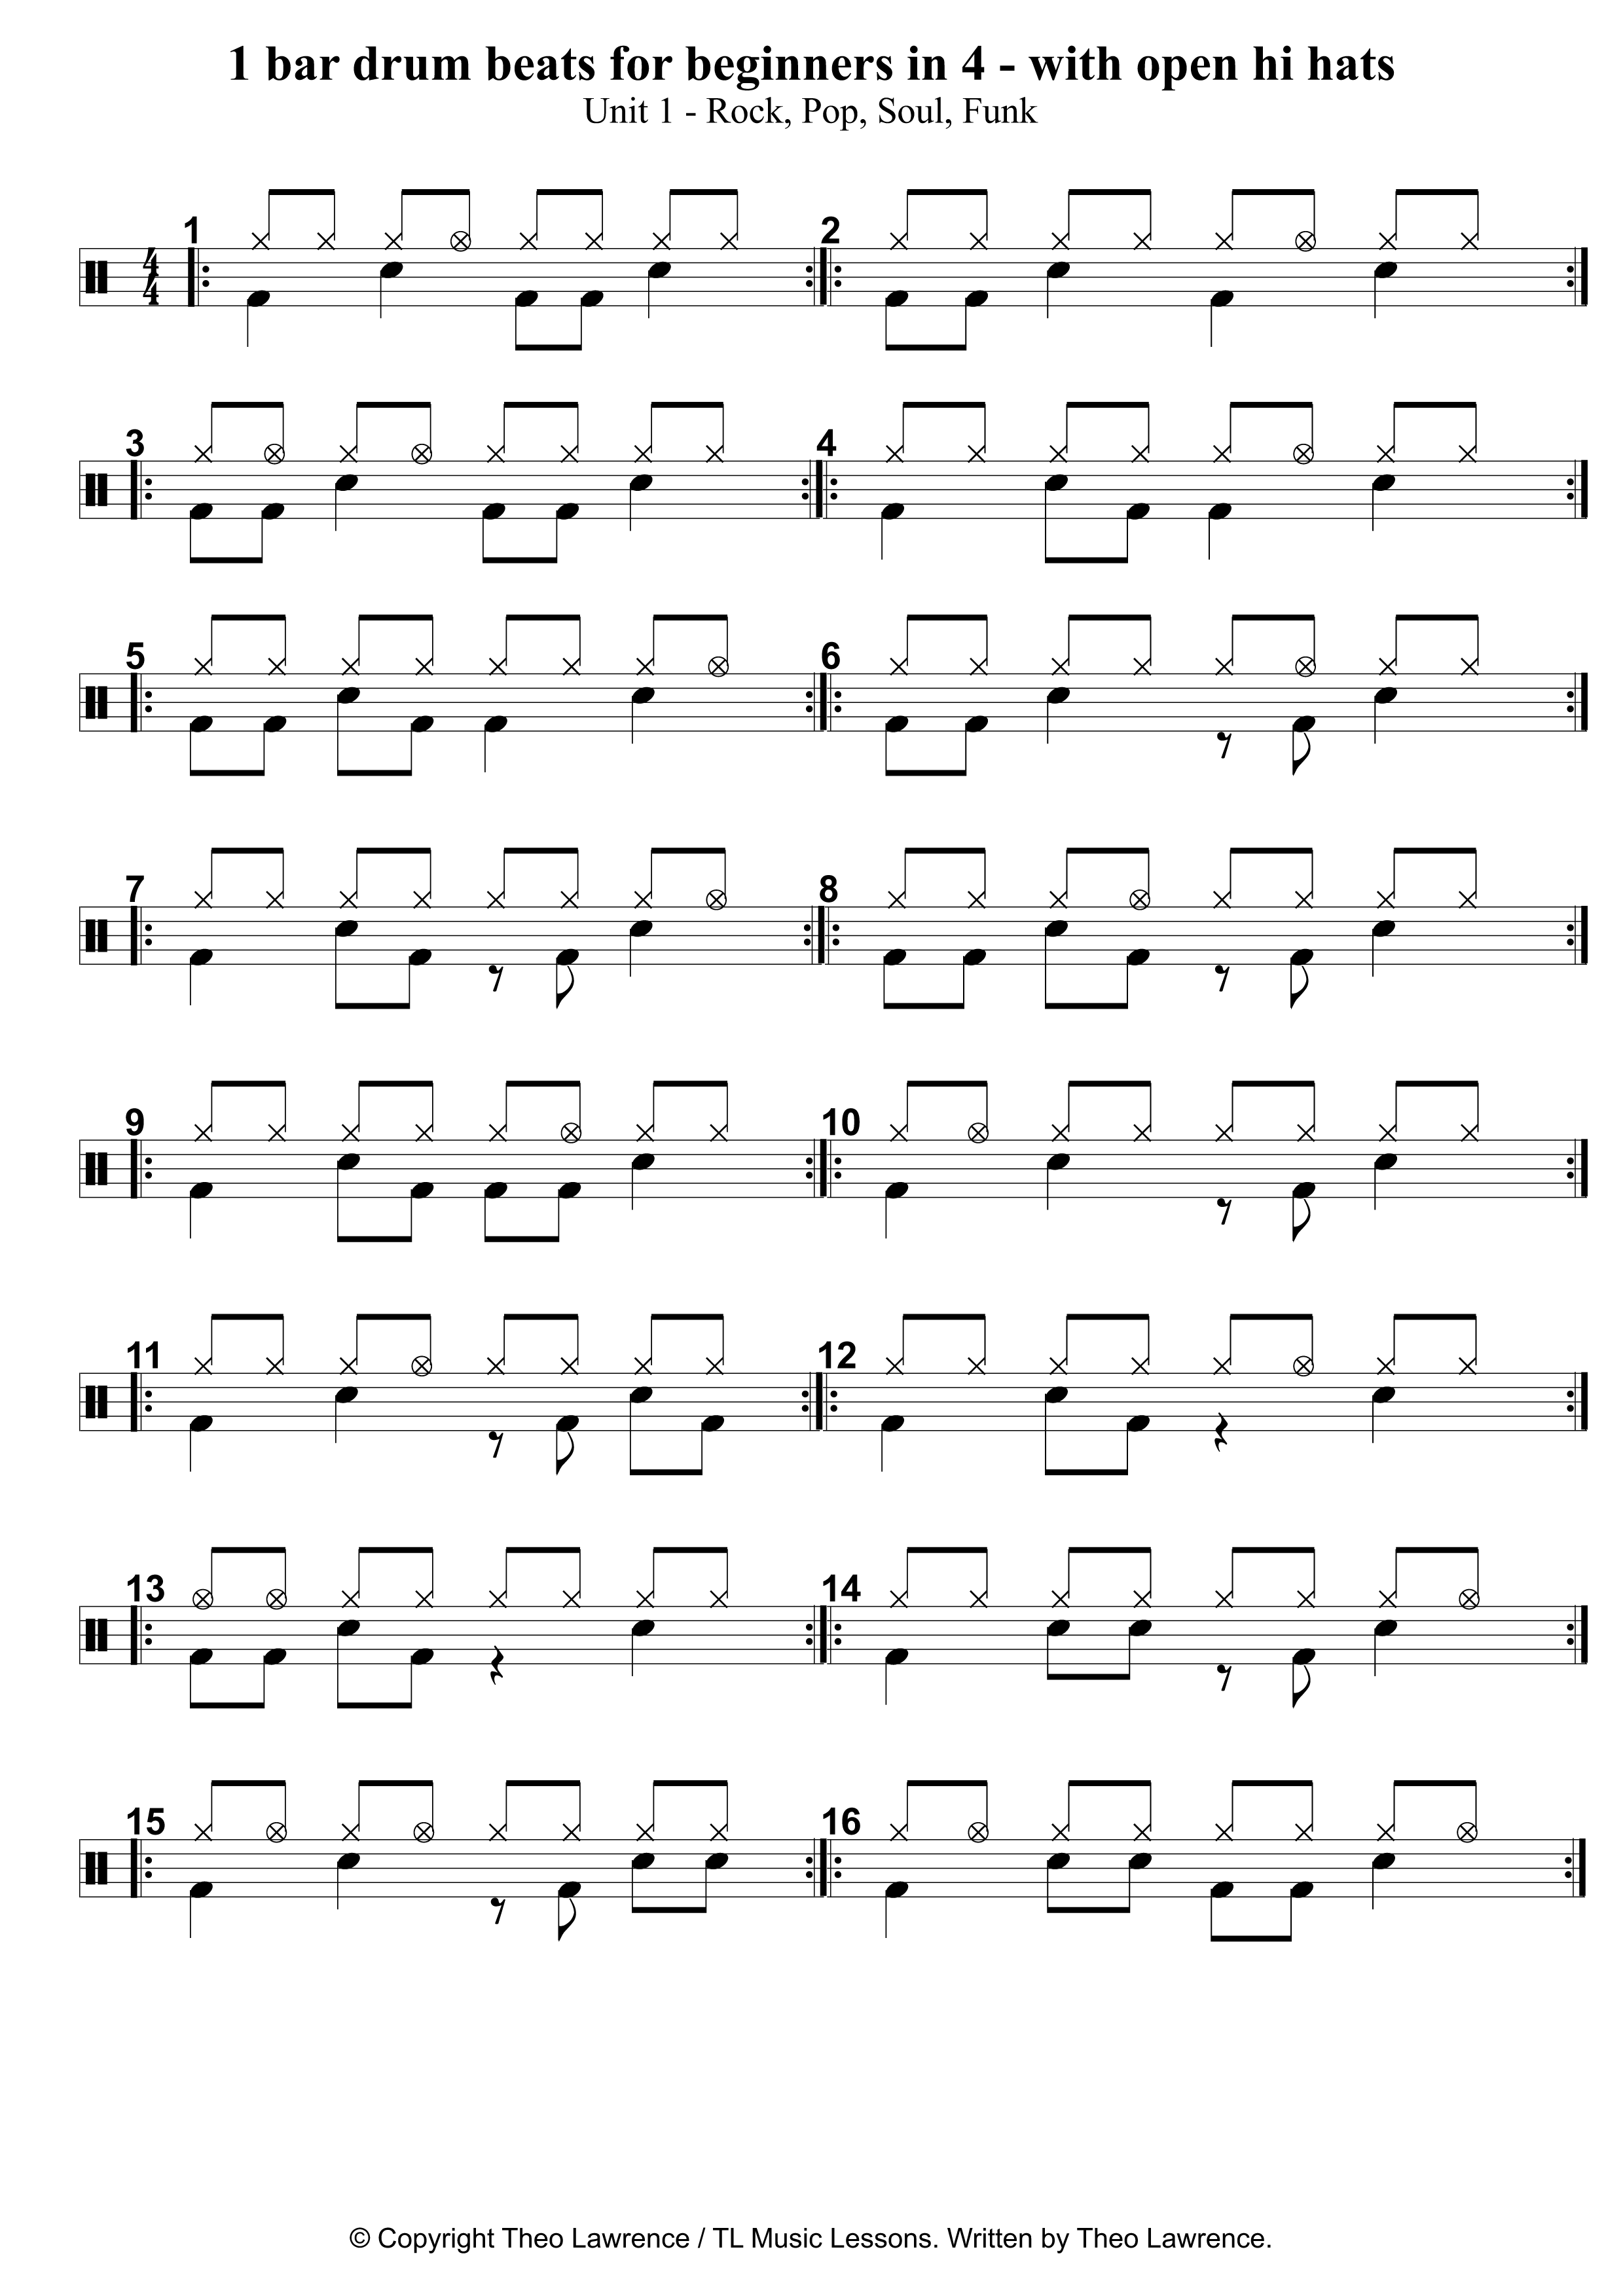
Page 4-14 Section 1: 1 bar drum beats
1 bar drum beats in 4/4
1 bar drum beats in 3/4
1 bar drum beats in 6/8
1 bar drum beats in 4/4 on ride with left foot hi hat
1 bar drum beats in 6/8 on ride with left foot hi hat
1 bar drum beats in 4/4 with open hi hats
1 bar drum beats in 3/4 with open hi hats
1 bar drum beats in 6/8 with open hi hats
1 bar drum beats in 4/4 with quarter note hi hats
1 bar drum beats in 3/4 with quarter note hi hats
1 bar drum beats in 4/4 with quarter note ride and left foot hi hat
Page 15-23 Section 2: 2 bar drum beats
2 bars of drum beats in 4/4
2 bars of drum beats in 3/4
2 bars of drum beats in 6/8
2 bars of drum beats in 4/4 with open hi hats
2 bars of drum beats in 3/4 with open hi hats
2 bars of drum beats in 6/8 with open hi hats
2 bars of drum beats in 4/4 with quarter note hi hats
2 bars of drum beats in 3/4 with quarter note hi hats
Page 24-32 Section 3: 4 bars of drum beats with 1 beat drum fills on the 4th bar
4 bars of drum beats in 4/4 + 1 beat fills on 4th bar
4 bars of drum beats in 3/4 + 1 beat fills on 4th bar
4 bars of drum beats in 6/8 + 1 beat fills on 4th bar
4 bars of drum beats in 4/4 with open hi hats + 1 beat fills on 4th bar
4 bars of drum beats in 3/4 with open hi hats + 1 beat fills on 4th bar
4 bars of drum beats in 6/8 with open hi hats + 1 beat fills on 4th bar
4 bars of drum beats in 4/4 with quarter note hi hats + 1 beat fills on 4th bar
4 bars of drum beats in 3/4 with quarter note hi hats + 1 beat fills on 4th bar
Page 33-39 Section 4: 4 bars of drum beats with 2 beat drum fills on the 4th bar
4 bars of drum beats in 4/4 + 2 beat fills on 4th bar
4 bars of drum beats in 4/4 with open hi hats + 2 beat fills on 4th bar
4 bars of drum beats in 4/4 with quarter note hi hats + 2 beat fills on 4th bar
Page 40-48 Section 5: 3 bars of drum beats followed by a 1 bar drum fill
3 bars of drum beats in 4/4 + 1 bar fills
3 bars of drum beats in 3/4 + 1 bar fills
3 bars of drum beats in 6/8 + 1 bar fills
3 bars of drum beats in 4/4 with open hi hats + 1 bar fills
3 bars of drum beats in 3/4 with open hi hats + 1 bar fills
3 bars of drum beats in 6/8 with open hi hats + 1 bar fills
3 bars of drum beats in 4/4 with quarter note hi hats + 1 bar fills
3 bars of drum beats in 3/4 with quarter note hi hats + 1 bar fills
Buy Now →