The best practice pad I have ever owned: Meinl MPP-12

The Meinl MPP-12 practice pad is quiet but loud enough that it’s satisfying to play. The rubber surface has some give to it so it’s not like hitting hard plastic. The bounce is realistic and similar to a tightly tuned snare.

I bought this pad to use with a youth snare drum group I tutor in the UK. It’s sort of a Snare Line, but I’m just a normal drummer adapting bits from what I’ve seen drumlines do for my group, and creating something different. We spend a large part of the weekly session on warm ups and exercises using the practice pads before then moving onto the snare drums to play pieces nearer the end of the session. I fell in love with this Meinl practice pad instantly when it came just by how nice it looks, and how it’s made. I was worried the playing surface might be too hard, but it’s not. When I started playing it, I knew this pad was a great choice.

The drum pad can sit on a table or on top of a snare drum just fine without moving around and with the volume staying about the same. It can also be attached to a snare drum stand. Meinl do sell a 6″ one that has a screw hole for attaching to a cymbal stand. I prefer the 12″ one because it can sit on a table or a snare drum and feels more sturdy than on a cymbal stand, which can wobble around. The 6″ pad is also less solid on a table or snare drum and is likely to move around a lot. I have attached a 6″ pad to a snare drum stand before an I can report it’s not good because the 3 parts where the stand grips the pad can get in the way of your sticks and you really have to crank up the screw thing underneath to get it to fit (annoying if you are switching between pad and snare often).

You can also get signature models such as the Thomas Lang practice pad seen in the video below. The video mentions it not being for practicing marching snares but I personally disagree because for the marching snare pads I’ve seen, such as the Ahead 14″ S-Hoop Marching Pad, I don’t think it’s good for people’s hands and arms to be hitting carbon fibre. My drum teachers in college always said it was dangerous to have practice pads that are hard because it can cause tendonitis. So I would say, these Meinl pads would be good for marching practice and general snare drum practice, but check with your drumline / drumming group before buying, because they might prefer something else. The sound of the 12″ pad has a nice crisp sound, not dissimilar to a marching snare.

Drumming Session for Keeping Fit

Guest Blog Post: Mia Johnson


People don’t normally think of instruments when they consider ways to get fit. They’re usually left to the realm of artistic expression. You create music with them and that’s basically it. However, one instrument has proven itself worthy of also being called a tool for fitness: drums. If you’ve ever looked at some of the best drummers in the world, you might have noticed that they are extremely lean. This is because drumming is a surprisingly good way to get in shape. It can be a very dynamic exercising tool with a bunch of fitness benefits. Here are some reasons why you might want to incorporate drumming into your fitness regime.

1. It’s a fast-paced instrument

If you had to pick one instrument to help you stay fit, drums would stand out as the obvious choice. They’re arguably the most fast-paced instruments that you can get your hands on. Drumming sessions involve constant hand movements that push players arm muscles to their limits.

Songs that are focused on drums usually sound extremely dynamic, which means that playing them will further motivate you to commit to the workout. When playing the drums, you can consider yourself an endless source of workout pump songs.

If you prefer slow songs that sound smooth, you won’t lose out on the exercise potential of drumming. You’d be surprised at how many movements are required to keep up even a slow hat pattern while other parts of the drum kit are working. Drums are very consistently dynamic when they’re used in songs.

Even if you’re not following the tempo of a specific song, but rather creating rhythm from scratch, you will still naturally aim for a higher tempo to test your skill and push your body to its limits.

2. Easy to get into

Many instruments have a very steep learning curve. For example, new musicians playing the violin will sound horrible until they get to a certain point where they might sound bearable. Even the simplest of instruments require quite a bit of practice before they can be used to create something that is appealing to listen to.

Drums are a bit easier to play in this regard. You get a lot of payoffs relatively quickly into the learning process. The learning curve isn’t as steep as some more melodic instruments. You can start with some very simple rhythms made up of two sounds and it will already be easy to listen to, although it might be horribly boring at first.

You don’t need to hire tutors to give you lessons in playing the drums. Using it as a way to exercise will help motivate you to learn more. After all, practice and repetition are what makes someone a good instrumentalist. You will unwittingly use your drum workout sessions as a way to get a lot better at playing them.

3. An endless source of fun

If you’re a fan of rock music, drums can give you the opportunity to bring some of that hardcore energy directly to your own room. Popular rock songs often have drum patterns that are just as recognizable as their guitar melodies. This means you can get the emotional rush of playing the song rather easily.

Drums are pretty unique instruments because their focus isn’t on creating a melody or chord progression, but rather keeping up a rhythm. It requires just as much skill as other instruments, but you might find that it gives you a lot more leeway and satisfaction than most other instruments. Drumming is all about improvising and going wild when you figure out a rhythm that suits your current state of mind. Once you get going, it can be hard to stop because it’s so ridiculously fun to play them.

4. It’s a cardio exercise

The constant and rhythmic movements of drumming help make it an ideal cardio exercise. You’re using a lot of your muscles for stability, which means much of your upper body is getting a hefty workout. The consistency at which drumming movements have to be done also affects your heart. It’s almost like having a run but using your upper body for the movements. In fact, there are various studies that compare the effects of drumming for cardio exercise versus running for long periods of time. It has been shown to be as effective as playing soccer for ninety straight minutes.

Drumming is a lot more adaptable than running or walking. People of all ages and skill levels can enjoy the perks of using it as a way to exercise. It doesn’t depend on the weight and it doesn’t give you any joint pain. Best of all, it’s going to help you keep your heart rate up no matter how good you are at playing them. Even if you make mistakes and have to have a do-over, it’s still going to be a very effective workout.

5. It’s an art

There are very few exercises that also qualify as an art form. Drumming allows you to create new music while also getting a wonderful workout. You don’t expect to get sweaty while playing the guitar or bass.

When you get better at playing the drums, you will find that your movements are much smoother and more precise. This is complemented by the same kind of improvement in terms of drumming as a workout. Your muscles get stronger and they allow you to make more precise movements with less energy being wasted. Your improvement as a musician will be followed by your fitness level and vice versa.

There’s a degree of emotional payoff when you play the music that you enjoy. At the same time, your body will get a rush of endorphins from the workout that drumming provides. Together, these two effects make playing the drums a very enjoyable physical and artistic experience

6. Drumming builds muscles

Most exercises fit into two different categories. You have aerobic exercises which consistently increase your heart rate and get blood pumping throughout your entire body. These include running, sprinting, and riding a bicycle. Basically, things that require constant movement. On the other hand, anaerobic exercises are sudden and powerful movements which tear a few muscle fibers and make way for muscle growth. Just about any weight-lifting exercise fits this criterion very well. Exercises like squats are considered anaerobic.

Surprisingly, drumming can fit both of these criteria rather well. Not only does it take your breath away, but it also paves the way for an increase in muscle mass for most of your upper body. You can expect to get chiseled hands the longer you play the drums. The harder you move the drum stick, the more stability your back needs to make that movement, which means that even your back muscles get bigger and stronger over time.

The muscle-building aspect of drumming shouldn’t be understated. It causes a lot of fibers to break and it leaves your body craving for protein and rest. After a long drumming session, you should always eat well and take a break. If you want to keep drumming for longer periods of time, you might want to keep your True Protein shakes near your drum kit. Without a constant intake of protein, you’ll very quickly get fatigued and you won’t be able to continue playing at the same level.

7. You can do it with friends

Working out with your friends is a great way to get your mind off of being tired. When you go out for a run, it’s a lot more fun to bring someone along with you. You can have a chat and make the workout session much more than just a bit of running. Hitting the gym with your buddy lets both of you enjoy the rest period after a tough workout.

Drumming is no different, you can easily work out while you’re spending time with your friends. It’s even encouraged that you get some like-minded individuals to play some instruments alongside you. You don’t even have to join a band to get the whole musical experience. People enjoy getting together to create spontaneous jamming sessions. There’s something about creating freestyle music that appeals to most musicians.

If you want to create something bigger than the sum of its parts, you could become part of a band. Rock music is traditionally made in a band environment, but it isn’t an absolute must. Some famous acts such as the White Stripes, have only two members that are multi-instrumentalists. Still, a band environment can help you meet new people and improve your talents as a musician and song creator.

Conclusion

Drumming has proven itself to be a ridiculously effective way to keep your body fit. It combines some of the best elements of various workout regimes while also being a really fun activity overall. You hardly even notice that it’s a workout. You can consider it an artistic expression that just happens to keep you fit the better you get. There’s no better way to combine art and fitness in one powerful and effective package.

The Role Of A Drum Throne For Correct Drumming Posture

Photo Credit: Unsplash

Guest Blog Post by Drum Helper


Lots of drummers are all too happy to play without much consideration for proper drumming posture. After all, it’s not as much fun to take a sensible and well thought out approach before wailing away at the drums!

However, it is very important. This is because injury prevention is the single best way to ensure you remain healthy, fit and active. Improper posture can cause back injuries, hypertension and poor mobility.

Not only is it important for promoting positive physical health, but also for improving performance. Playing the drums with correct form and posture will allow a drummer to play with greater fluidity and exercise better control behind the drum set.

Being able to play the drums comfortably will translate to how you perform for each rehearsal and performance.

The foundation of correct drumming posture lies with the drum throne and the height it is set at.

Drum Throne Height

This is the most overlooked aspect of maintaining a good drumming posture, and I see far too many drummers sitting at an incorrect height (in correlation to their own frame) whilst playing the drums.

The drum throne is required to be positioned according to a drummer’s own height. This means if you are 6 foot you will position yourself much higher than someone who is only 5 foot 5. Drum thrones have a large range of height adjustment so don’t be afraid to experiment and see what works best for you.

Frequently I see tall drummers sitting far too low down and because their legs are far more extended out and then find themselves having to reach further to play the toms and cymbals within the drum set.

As a general rule, you will want to have your knees sloping downwards at a slight angle. You will want your spine and lower back sitting above your knees. So this means avoiding having a 90-degree angle for your legs.

Being sat at the correct height means you can also comfortably reach all the drum set components whilst conserving energy.

Once the drum throne is a correct height, the pedals will be required to be positioned to exactly where the feet fall naturally. And the batter head of the snare drum should sitting around 1 or 2 inches above the knees.

Invest in a Supportive Drum Throne

Good quality drum thrones offer superior comfort and support to cheaper alternatives. Quality thrones feature high-density foam cushions that support weight evenly and retain its original mass and shape for years without warping, breaking, or become uneven over time.

The base of a good quality drum throne is far more stable compared to cheaper drum thrones and this is vital for good posture. Cheap stools wobble and make a drummer unbalanced and unstable around the pelvis area and this can pose a huge risk to injury.

There are high quality drum thrones available to suit all different levels of budgets. Even if you have a small budget, there are supportive and comfortable options to choose from.

Drum Throne Height Adjustment

Drum thrones across the board will all feature different height adjustment mechanisms to raise and lower the height of the stool accordingly. Here are the various types of height adjustment mechanisms found in drum thrones:

Nut & Bolt-Lock (Avoid)

This is a mechanism exclusively found in insufficient, low quality thrones that are to be avoided at all cost. Every single cheap stool will use this type of height adjustment and you can guarantee it will wobble and break. They provide terrible posture and have very limited height options.

Sliding Tube & Memory Lock:

This type of mechanical height adjustment is fairly straightforward. It’s the same as found in cymbal stands. You are easily able to loosen a clutch that rests underneath the seat and you are able to slide up or down the metal tube to your desired height.

Spindle Adjustment:

The threaded spindle adjustment is a popular mechanism for drum thrones. It is very simple to use, you are able to adjust the height with a single hand by spinning the seat top either clockwise or anticlockwise depending on if you would like to raise or lower the height. This is the easiest and most popular mechanism offering unlimited height adjustment.

Final Thoughts

A drum throne and its settings are sadly a very overlooked aspect of drumming that is, in my opinion, essential to allow a drummer to play at his best. And perhaps more importantly minimizing the risk of injury caused by poor posture.

Good drum thrones offer a wide range of adjustment, so I would encourage you to experiment with heights and seeing what works best. I find that more often than not the problems are with drummers sitting too low down as opposed to being higher up.

When raising the height of a drum throne you will also be required to raise the height of the drum set components including snare drum, hi hats and cymbals so you aren’t stooping lower to have to reach them.

I have personally found that sitting higher has improved my playing, allowed me to be more relaxed and has put less stress on my legs and shoulders.

And of course, develop good habits by remembering to sit up straight with your shoulders held back and relax your arms whilst you play.

Blurb

Gideon Waxman is a London based drummer with over 13 years experience, and is the drummer of metal outfit Familiar Spirit. You can find more of his tips at Drum Helper – a free online resource dedicated to helping drummers achieve more from their playing.

Choosing Your First Drum Kit Made Easy

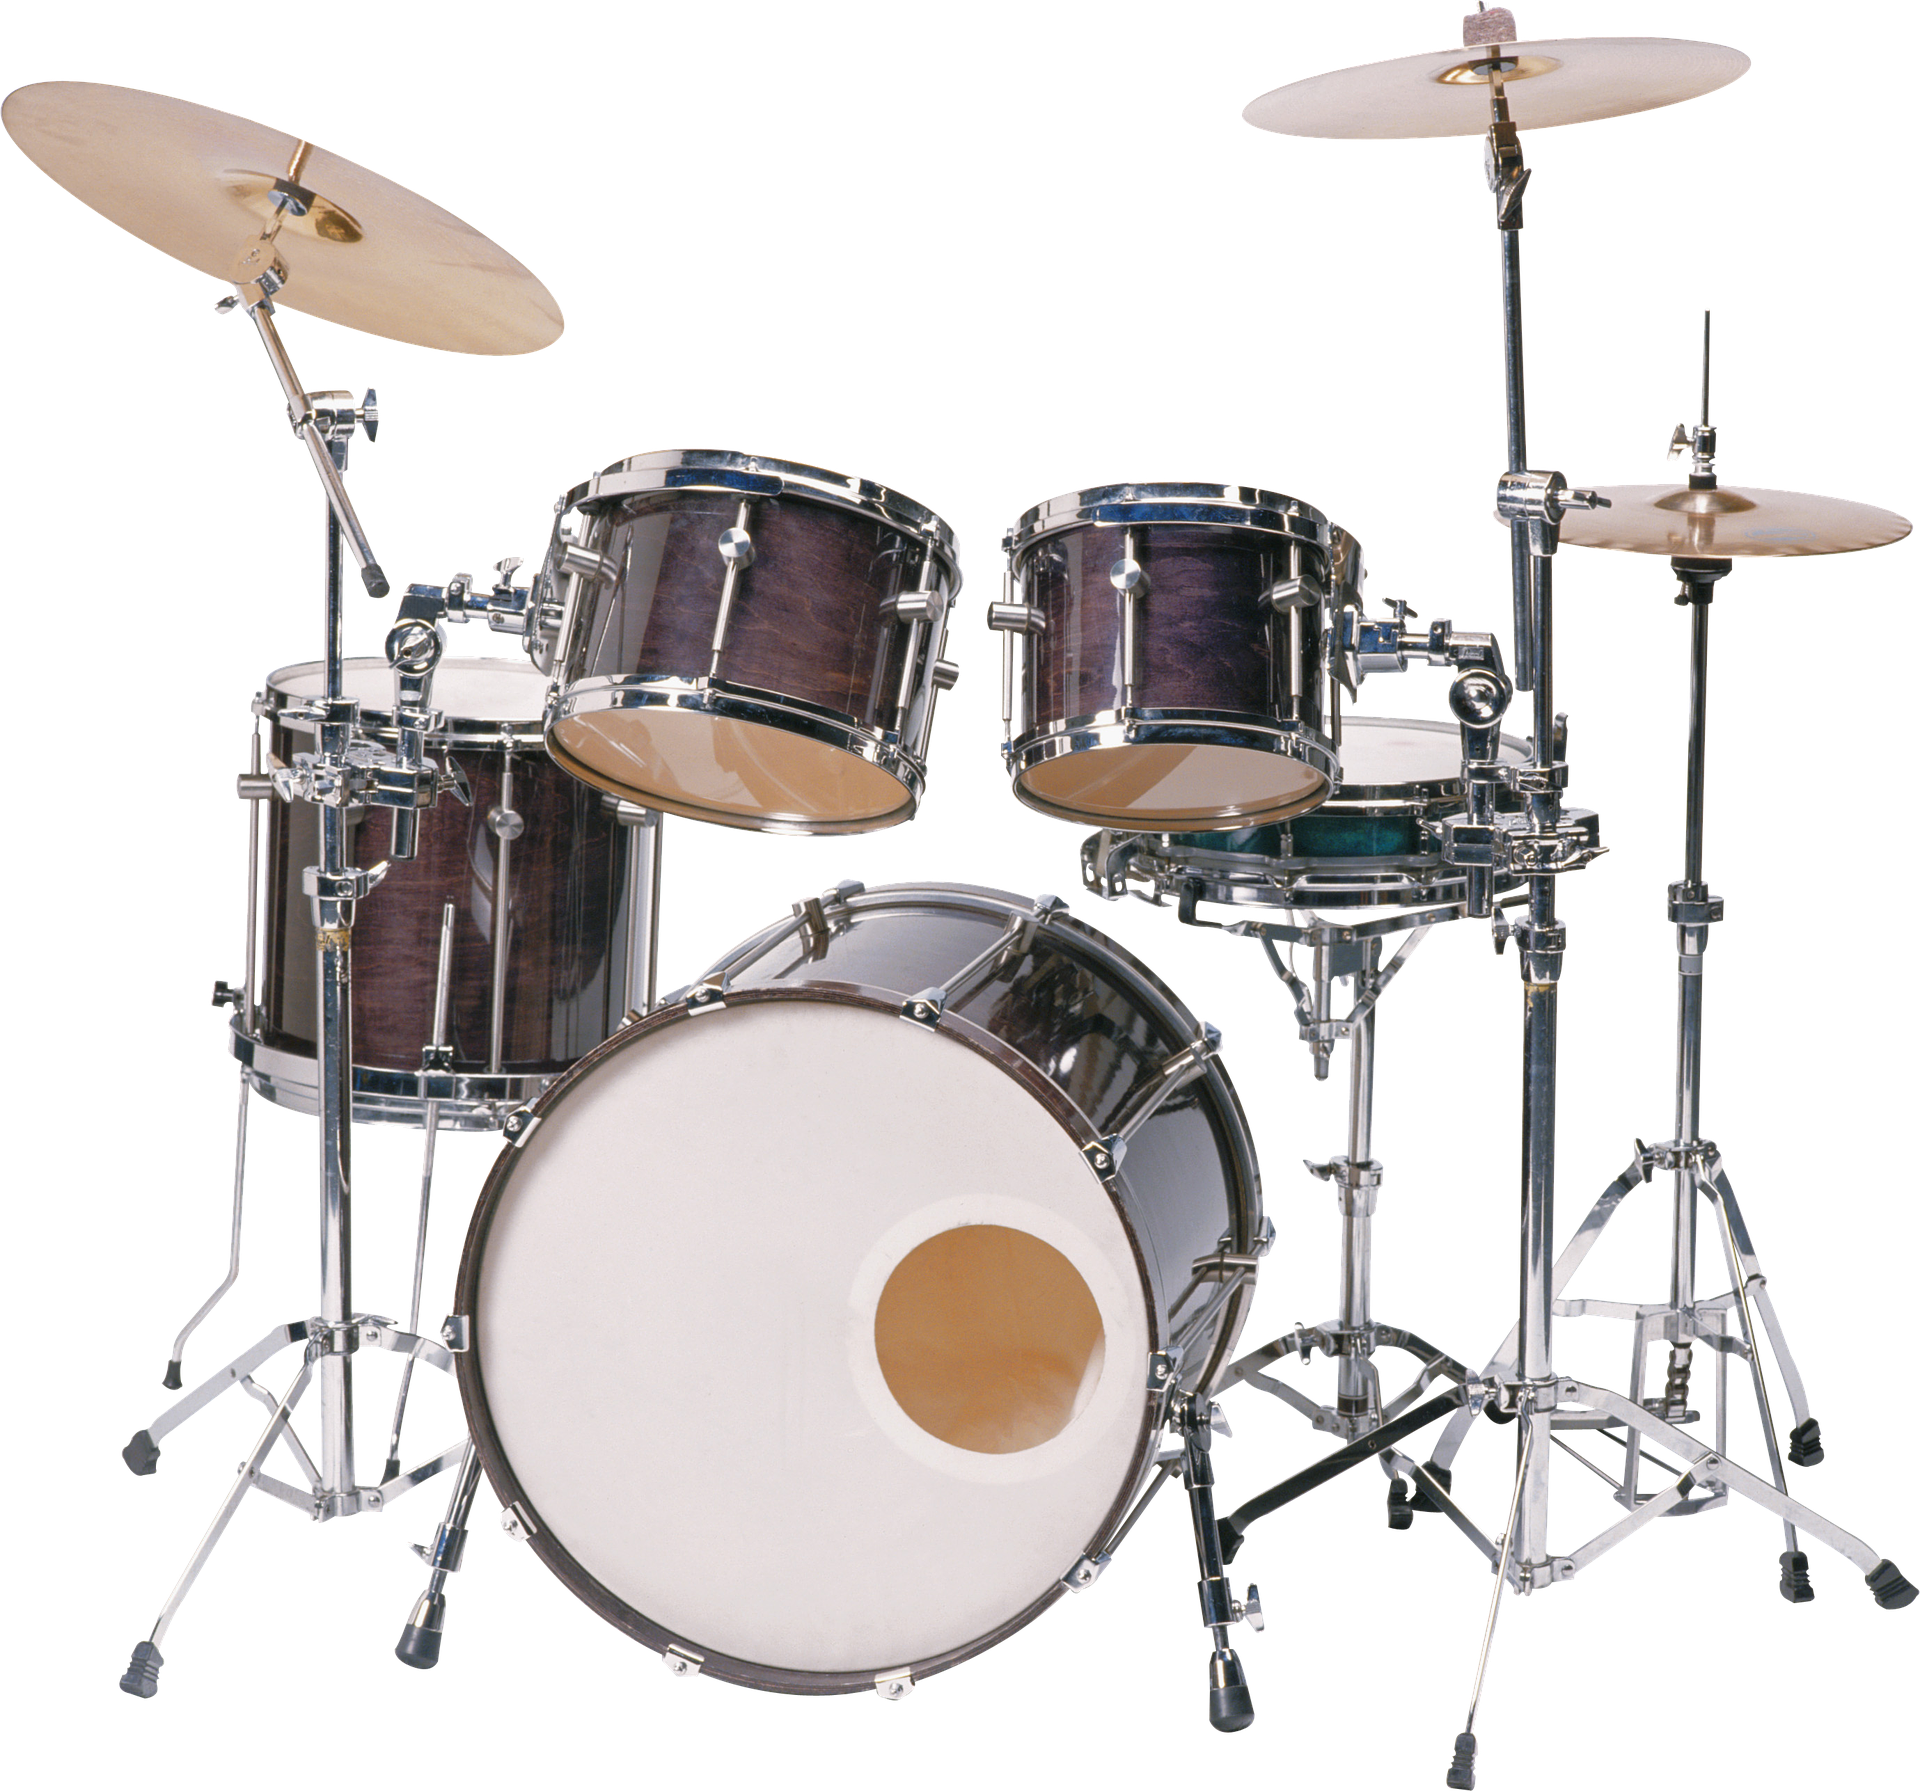
Image credit: Alexander Lesnitsky from Pixabay.

In cooperation with consordini.com.


When picking out or setting up a drum set, a lot of people run into challenges during the process. Unfortunately, this is because they do not know what to look for.

People struggle with how much money to spend, what they should be concerned with, and what will make their experience the best one possible.

With many newbies never playing drums in their life before, they do not even know what sound they are going for with their drum set. This can be a very, overwhelming experience.

So, instead of being frustrating with your drum kit experience, enjoy the time you spend on picking the best drum set for you and your lifestyle.

Drumhead Decisions

Drumheads are one of the most overlooked parts of the drum set. In reality, the thicker the drum head, the darker the sound becomes. In turn, there is a low amount of resonance, but a higher pitch overall. Currently, some of the head options you could look into include Evans and Remo.

On the other hand, if you are someone who likes the sounds of a thinner head, then you probably like a bright sound. With extra resonation, these drum heads do not need much to make an incredible sound. Drummers, who use these types of heads, usually are playing in a quieter atmosphere, where the drums do not need to be played loud.

One of the last drumhead decisions you should consider is whether or not you want a coating on your drumheads. Having a coating is great for adding a darker sound, so pairing with a thick drumhead can create amazing controlled action. Without a coated head, you can expect a great attack and bright sound. Usually, coated drumheads are seen on the snare drum.

The Right Size

Some people may see a drum set and just expect it to be good, but there are actually a few decisions that will make your drum playing experience a great one. If you are into jazz music, a four-piece trap will do the trick nicely. The bass drum needs to be either 18” or 20”, the toms can be 10” or 14”, and a 14” snare is best.

Other kits, like the 5-piece variety, usually have a bass drum at 22”, toms at 12” and bigger, and a 14” snare, similar to the jazz trap set-up. With a bigger sized drum kit, drummers will not be limited to one style, but a multitude of styles.

Not everyone is up for a 6-piece set, but you might be interested. If you are looking for great flexibly, you can add a 16” tom for the floor to play any style of music on the planet.

Marvelous Materials

With anything, some people are not really concerned with what things are made of, but rather if the product works and if it is efficient for what it is used for. However, you should be aware of what shell material your drums are made out of.

Let’s start with maple. This material is perfect for jazz and acoustic sets. If you are looking for a material that brings the punch, birch is the material for you. Additionally, there are hardwoods, like mahogany, that provide a great tone, too.

In terms of price, birch and maple material will be the most expensive, so some first-time drum buyers might steer clear because of the cost. Before purchasing, consider demoing the material and then make your crucial decision. This can be a fun, yet informative experience that will only take an hour or so.

Extra Hardware

Drum heads and drum material barely scratches the surface with any drum set. You will still need to purchase things like the throne, stands, and pedals. With the throne, this is an item that gets a lot of use. Make sure that you pick a throne that is comfortable to sit on. Your backside will appreciate it. Look into thrones like Tama, Roc N Soc, and Pork Pie.

A high-end bass pedal should also be on your radar. This type of pedal can adapt to any type of style, and it can last a lifetime. Look into brands like Tama, Mapex, and Pearl to help you on your way.

The last hardware of importance should be the stands that hold your drums and cymbals. Sure, many of the sets that are purchased today come with stands, but usually they are low-end.

Upgrading this part of your set can go a long, long way. Some people look for durability in their stands. This is when double-braced legs are your best friend. If you move your trap around a lot, use legs that are single-braced.

Sensational Cymbals

The last piece of the puzzle involves cymbals. Picking the right cymbals really personalizes your set. There are two different cymbal materials to choose from: bronze that is casted and sheet bronze. Casted bronze has a wide-ranging tone, while sheet bronze is more inexpensive with less tones to account for.

When it comes to casted bronze, check out brands like Sabian and Zildjian. On the other hand, for sheet bronze, identify brands like Paiste, Zildjian, and Sabian. By investigating these brands, you will have a group of cymbals that mess well with one another, depending on your decision.

The Big Finish

With all the information above, you will definitely not be frustrated with your first-time drum buying experience. Ultimately, remember that your best option is to check out sound demos, go to a local shop, or try a friend’s trap out for good measure.

Do not just go through the process in a hurry. The more time you take, the better you will feel about your purchase. Then, you can just enjoy your drums and get to work honing your drum skills.


Find more articles like this at consordini.com

30 essential productivity apps, business management tools and other apps or websites that help to run an online business and a local music teaching business

Here is a list of 30 essential productivity apps, business management tools and other apps or websites that help to run an online business and a local music teaching business.

The list here is what suits me and keeps me going as an individual business. There are other things I use but these are the main ones. These may not be suitable for everyone but they are all things that I happily recommend to others. Some are obvious, like the google products, but you might find a few that you haven’t heard of in the list.

Below the list is more information about how I use the things in the list to operate my businesses.

1. Google Calendar & synced to phone calendar (scheduling and also useful for setting reminders at specific times)
2. Google Docs / Spreadsheets (for creating invoices, records of who has paid, income spreadsheets). For offline and advanced database use, Libre Office Sheets and Calc are free and are just as good as Word and Excel imo.
3. Google Drive (access everything on the move; lesson plans, ebooks, records of who has paid invoices)
4. Google Keep (for saving photos or notes on the move)
5. Gmail (email)
6. Google Maps & Belkin Phone Holder (replaced sat nav)
7. Google Contacts (can group contacts into categories such as school names)
8. Remember The Milk (to do list, web and mobile app)
9. Mailchimp (mailing lists)
10. Payhip (for selling ebooks)
11. Paypal (payment processing)
12. Bandcamp (for audio downloads)
13. Ditto Music (digital distribution for music)
14. Sentric Music / Hit Licence (pitching music to tv / film etc)
15. BBC Weather Web / App (Try to dress for the weather)
16. WhatsApp (Reluctantly stay in close contact for certain projects)
17. Adsense (advertisement revenue)
18. Phone’s native clock, countdown timer and calculator
19. Heart Internet Web Hosting and Domains (to power the websites)
20. Drupal & WordPress (CMS for websites)
21. Spotify (always have access to songs that I need to teach)
22. DaTuna app (tune guitars using phone – android)
23. Justin Guitar metronome app
24. Abelton Live 9 (Suite) – Education Price (DAW for making music)
25. Dropbox or Wetransfer.com (sending / sharing large files)
26. Landr (Cheap and Easy Mastering Service)
27. Adobe Photoshop & Adobe Illustrator (for all artwork needs such as posters, music artwork, ebook covers, web banners etc.)
28. Adobe Acrobat Pro (for creating ebooks from single pdf files)
29. Guitar Pro (for creating lesson plans and sheet music for ebooks)
30. Quickbooks Self Employed (Used for Invoicing students’ parents every half term and for forwarding email receipts to record them in Quickbooks. It is basic, but it suits my needs.)


I do most of my work from a desktop computer. It’s pretty old school I know but actually I like sitting down at the desk and getting immersed and then being able to walk away and leave it, rather than have the temptation of trying to work on the sofa (I know some people that prefer the sofa though!). I keep my mobile contract slim and use a cheap to mid range phone, which is a smart phone, but it doesn’t cost loads.

My bookkeeping, teaching schedules, invoices, paid lists, have all been done using my own system of documents and spreadsheets that are quite refined and easy to use for my business now. I have recently moved onto Quickbooks Self Employed for invoices, which has made writing and sending them easier. My process to record payments for school lessons used to be to input it into a spreadsheet, then copy and paste into a ‘paid’ documents file for each given half term and school, and delete the pupil’s name that has been paid for. I would then check who still needs to pay. My invoices use a template I made and I had a copy of that in the same folder as the paid file for each half term and school name. The invoices always include payment info and at the top of that list is bank transfer details because that form of payment has the least admin for me. I then export that as a pdf file and email the parents at the start of a half term. Mostly I have to make different ones for each half term and ammend for different pupils if they have missed lessons or have not paid for a half term.

I also have a spreadsheet of all of my pupils in each school and their instrument and time details, and rows of checkboxes so I can print them off and use them as a rota for the half term. In high schools the rotas need to have time slots added to the rota. For primary schools, they are too hectic and unpredictable to make rigid timetables for, so I don’t bother. At the start of a new half term, I will copy over all the files from the previous half term and begin editing them for the next one. Usually the amount of weeks per half term changes so there is always something to change. I leave an extra list of pupils per school in the paid files so that I can copy them into a fresh ‘unpaid’ area below, and then I can delete them off as they pay.

I keep an up to date copy of parents’ email addresses in Google contacts and group them into different schools and also give them instrument tags incase I need to email all of the guitarists for something at once. I always try to email the parents using the bcc send field, and this is easy on a computer with a mouse because you can select all the contacts from google contacts, and click to send email, then drag all the addresses into the bcc field. I also have a mailchimp list but it’s not easy to keep that updated as well so I tend not to use it. I do for my website subscribers though.

For my websites www.learndrumsforfree.com and www.learnguitarforfree.com most of the files are hosted on the websites. I learned how to make websites before starting to teach, which has really given me the tools to build an online business too. I learned html and css using an O’Reilly book and the rest followed from there. Actually it all started from the coding features on myspace when bands could change the styles on their pages and adding in banners etc. My sister does web design and artwork in the music industry and she said that probably started her off too, or gave her the coding bug. I use dreamweaver to edit code because the colours are useful, but other free ones are available, and filezilla for ftp file transferring.

I use payhip for all of my pdf ebooks, which is the best I have found. It links to paypal for payments and it has just added a feature to automatically add customers to mailchimp lists. People that download free ebooks are added to my regular subscriber list for upadtes of free blog posts, and paying customers are added to a special list, which I send info of new ebook products to when they are released. Bandcamp is used in a similar way for audio and music, although their mailing list integration is not as good so I can’t really use that effectively at the moment unless I set up more accounts and then export email addresses to the appropriate subscriber lists.

I have found that social media is pretty much a waste of time for my online business at the moment but the mailing list is great, and actually pinterest generates the most hits, so I do chose to get rid of all but the pinterest. It’s all about finding what works for your business and choosing the right platforms to get the most out of your time and effort.

I get many hits per day on both sites quite often and almost all the traffic is organic from search engines. It’s taken years to build up so it really is a lot of hard work but adding to it “little and often” really helps build up a huge site over time. Most of my ebook sales follow searching for free stuff from organic google searches and then discovering the ebooks. I believe this is called a “fremium” business model. When I launch a new ebook and send it to my paying customers mailing list, I usually get quite a few sales from them, so that is really useful for me and them.

Hopefully this gives gives you ideas for your own online business. I tried in the past setting up my own ubercart shopping cart and hosting everything myself, but I had to switch to payhip due to new EU tax rules on digital products. It was too hard to manage myself but payhip and bandcamp both sort sll this out for you. For every ebook sale, payhip takes off the tax, which is different depending on each country, from the money I receive, so they literally take care of everything without me needing to register to pay tax in every country. It completely took the hassle away from thiose new laws.

I also make music and play in a band so I have an unlimited ditto music subscription to release to spotify and itunes etc. whilst bandcamp is the best, not all customers are used to that so you kind of have to make things available where the customers are.

Guitar Pro is the best in my opinion! I’ve tried Sibelius but that’s probably only better for orchestral stuff. Guitar Pro is amazing for most instrumentsl sheet music writing, including guitar, drums, ukulele, bass and even instruments such as flute and piano. I always use it for all of my sheet music. I even use it to export midi to Abelton sometimes, rather than using the piano roll to input midi.

Abelton has been great for making music from midi, recording my own music, making backing tracks, and for teaching other music production. The education price helped me to buy it. Landr is a quick, easy and cheap way to finish off tracks so they are ready to release. The mastering is pretty good. I subscribe for a month and then cancel it when I am done.

All of the chaos that is my schedule is fairly organised with Remember The Milk and Google Calendar. Both can set tasks and appointments to repeat weekly or as often as needed, which is really useful. I use both services on the desktop and synced to my phone. My email is also really important for my business. I sometimes send emails to myself with important TO DO list items for that day, so I can’t possibly miss them.


Related: 10 tips and advice for running your own drum teaching business

HAIM uses Bass Drum, Toms and Rims to interesting effect in this supurb live music video

The drums in this video are towards the end of the song, but if you have time, watch it from the start because the drums have more effect when you’ve got into the song.

When you hear layered drums on recordings, this is a visual representation of how these types of sounds are acheived. What you see in the video is the actual audio you hear too, much to my suprise and delight because so many other music videos are usually mimed to a studio recorded song. After tentatively reading the comments for the video, it appears to be general consensus that this ‘live version’ is better than their other studio recorded version (later released), which to me is a reference to live music being the winner over studio production.

So, enjoy this video, in all it’s glory, of a truely live recording executed supurbly.

WATCH:

10 tips and advice for running your own drum teaching business

Photo Credit: Image by rawpixel.com

Whether you are thinking of starting your own music leaching business, or looking for ways to improve the management of your self employed music lessons business, these 10 tips have been written with you in mind. All of these bits of advice are related to my own business and are things that I do or have learned throughout the 6 years of teaching music in schools and doing private lessons, while being self employed and organising everything else involved outside of the actual teaching.

1. Plan your week with a digital calendar

Easily manage your schedule online and sync it to your mobile devices. Reschedule lessons on the move and set reminders to pop up at certain times if needed. The main advantage of a digital calendar is that you can schedule recurring lessons to be the same every week, and then modify each one individually if you need reschedule for one week – saving you lots of time writing in the same things into your calendar each week. I use google calendar and sync it with my phone’s calendar.

2. Get a digital to do list

A todo list that syncs to your phone, like Remember The Milk, is very useful and can help build up your reputation of someone that is reliable, because you will actually follow through with the things you say you will do. There is always something that crops up in the day that needs to be addressed at a later time. A busy music teacher can have hundreds of little tasks in a week that crop up, and adding them to a todo list will make sure they get done.

3. Organise your lesson plans and content

Structure your teaching into ability levels and topics. Make sure you are covering everything that you should be teaching to the best of your knowledge. Create lesson plans or exercise sheets, or compile ones from books or online lessons. Keep digital files and print as needed. I keep my files in google drive or in dropbox so I can use them on the move. Don’t hand write everything in your own time unless you are only doing it once and photocopying it for future lessons. You should end up with more content than you can carry with you at once. Therefore you might want to structure lesson material into different topics throughout the year, or use or create a series of books that the students can progress through.

4. Use books and booklets rather than individual lesson handout sheets

If creating your own lesson plans, try to compile them into a book or booklet that can be printed out and stapled or binded together, or used as an ebook. This will mean you won’t need to worry about printing off new lesson handouts every week or so. Even better, the student will be able to visualise their progress as they make their way through the book. Furthermore, you could think about selling your books online. It can be a nice way of passively bringing in an extra income while you are doing other things. I use a company called Payhip to sell my ebooks and premium downloads.

5. Offer to teach grades

Working through a grade book is a good way of learning and teaching. Make sure you only teach grades that you could do yourself. You should always be at a higher grade than what you are teaching, and ideally be several higher.

Grade 6-8 award ucas points, which are a good incentive to start learning early and have dedication to progress up through the grades before university age, where extra ucas points might prove useful.

6. Dress smart and be professional

If you take your job seriously and want your students and parents of students to take you seriously then I believe you need to make the effort to look smart whilst working. You might also be a musician and have a strong image as well, but it is best to save certain things for the stage. Being your own boss is great so you don’t have to, but people feel more comfortable if you make the effort with your appearance, especially if you work in schools as a peripatetic music teacher.

7. Make sure you work enough hours per week

Music teachers can charge much more than minimum wage, which is great unless they don’t do enough billable hours. To make this job pay a decent wage you need to make sure you are putting full time hours during term time at least. It is easy to fall for the illusion of charging a high hourly rate, and working part time hours, only to end up with a low income at the end of the year.

8. Have music related goals and activities outside of your teaching

Keep your dreams, goals, ambitions and love of music alive. You might downsize them as the years pass by, but always remember why you play your instruments and do all you can to be a musician as well as a music teacher.

9. Practice and improve

There is always something new to learn in music. Never stop learning and improving! Make sure you practice – practice what you preach to your students. I also see recording music to a click as practice, and you are also getting a physical end result from it.

10. Keep a contact list of all pupils or parents of pupils

I use google contacts, and stay in regular contact about lesson times and news etc. I group them by instrument, and also by which school they have lessons in, or if they have non-school lessons. Emails are the best method of contact I think because you can send to many all at once easily, most people use email now, it is free, and you can attach things. Phone calls are inconvenient to many now, texts are not as easy to send to everyone quickly, and facebook and twitter messages/updates are easily missed.


/>I hope you have found some or all of these points useful and relevant to you. There are many other things I could write about in this list, and I hope to write another one in the future. Meanwhile, have a look around the internet for similar things as there are many helpful bits of advise. One website that I constantly find tips from for running a business, which I would recommend to you, is: www.entrepreneur.com


Related: (www.learnguitarforfree.com) 30 essential productivity apps, business management tools and other apps or websites that help to run an online business and a local music teaching business

How to get good sounds from your cymbals when playing the drums

Photo Credit: Owen Byrne

Hi Hats

Beginners often play the hi hat too loud, and sometimes this is down to where they are hitting on the hi hat cymbals rather than how hard they are hitting. As a result, their playing sounds messy, and their sticks wear more quickly. If this is happening to you, it may be time to address your technique for playing the hi hats.

Regular hi hat sounds should be played using the tip of the stick on the top of the hi hat, half way between the edge and the bell, and range of dynamics can be played here. The left foot should press down quite a bit so that the sound is clean and tight. However, too much pressing down with the foot will give the sound a weird ringing noise, which doesn’t sound good, as well as being tiring pressing down with the left foot for long periods of time.

The area closer to the bell has a higher frequency tone, which is good for a brighter sound. This area is good for styles like soul funk, particularly for adding in open hi hats.

The edge of the hi hat should be reserved for accents or for more frequent use in heavy genres like hard rock and metal. Even in those styles though, variation between the top and edge are effective.

The edge of the hi hat should be played with the thick part of the drum stick, which is called the shoulder. This is the best part of the hi hat to get an open slushy sound – this is used most of the time in metal music and fairly often in rock too.

For most other styles, single open hi hats that close after are best played with the tip of the stick on the top of the hi hat. This gives a crisp clean sound. You will find that these compliment a drum groove nicely, and that playing an open hi hat on the edge is good for times when you want it to stand out more – for example if a band is playing some stabbed rhythms.

To get a nice sizzley jazz open hi hat sound, try hooking on a light chain on the top of the cymbal.

Finally, you need a good set of cymbals! For a good studio recording or live playing, an expensive set of cymbals will always be better. You can still sound good though by following the advice above, as long as you have a set of fairly heavy weighted cymbals, unlike the water thin style cymbals that come with some cheap beginners kits.

I will leave you with this thought: a well played set of cheap hi hats will always sound better than badly played top of the range hi hats.

Ride Cymbal

The ride cymbal can be pretty loud, so always try to lower your stick so that your strokes are fairly close to the ride cymbal – this should help keep the volume from getting out of control and also give you dynamic room at add accents on the ride or the bell when needed. Make sure to hit the ride half way between the edge and the bell with the tip of the stick – NOT the shoulder (keep that arm up!). Play the bell with the shoulder of the stick, or if you want a light bell sound, with the tip of the stick. You can crash the ride too when required. To get a nice sizzley jazz sound, try hooking on a light chain on the top of the cymbal (as pictured in the featured image).

Crash Cymbal

Always “Crash” using the shoulder of the drum stick, on the edge of the cymbal at about a 45 degree angle. Hitting it to the left or right of the middle will help prevent cymbal cracking. Strike with a glancing blow whilst also following through with your stick. Continue the motion left or right depending on where you are going to next. For example, if the cymbal is on the left hand side of the drum kit and you want to get to the ride cymbal next, hit the cymbal at the right of the middle and glance off to the right – you’ll arrive at the ride cymbal much quicker.

You can also play a crash cymbal like a ride cymbal, with the tip of the stick. For example, in Jazz this can provide opportunity for variation when there are a lot of ride based drum beats.

China and Splash Cymbals

Play these like you would play a crash cymbal.

Bell Cymbals

Like a huge bell from a ride cymbal, these really cut through any mix and are usually played with the tip of the stick or sometimes with the shoulder of the stick. Some players have them positioned upside down. There is no right or wrong way.

7 drum beats for keeping light time

Recently I played drums in a musical at my local Theatre. I hadn’t really done this kind of work before, apart from once a long time ago. I encountered quite a few sheet music directions that I was not used to – and a few that I had never heard of. One of the things I saw was ‘light time’, or ‘keep light time’. This was pretty straight forward and easy to know what it means (play a very soft drum beat to help the singer keep time), but this post is here to show you the types of beats I relied as a basis for these sections.  What I have for you here is 7 drum beats containing the drum sheet music of the kind of beats I played in these sections.

What happens when you opt for gaffa tape instead of bass drum impact pads

Having visited various rehearsal studios around the UK, I have seen this happen so many times.

I believe that it is a common thought to skimp on buying a bass drum impact pad, and choose gaffa tape instead. Please don’t do this!!

The idea of the pads is to prolong the life of a bass drum skin, by adding an extra layer of material where the bass drum beater hits. The problem with using gaffa tape (aka gaffer tape, duct tape), is that it wears away very quickly and becomes extremely sticky after a day or so of drumming. This then causes your bass drum pedal beaters to stick to the drum when playing and leaves a residue on the beater heads. After the stickiness has worn off, you can play the bass drum like normal again without it being an issue.

In conclusion, putting gaffa tape on a bass drum skin only serves the purpose of wrecking the aesthetics of the bass drum skin, and spoiling the surface of your bass drum pedal beaters, and perhaps prolongs the life of the bass drum head by approximately 1 day.